DIY projects from Your Home and Garden
Brush up your painting skills and brighten your wash days.
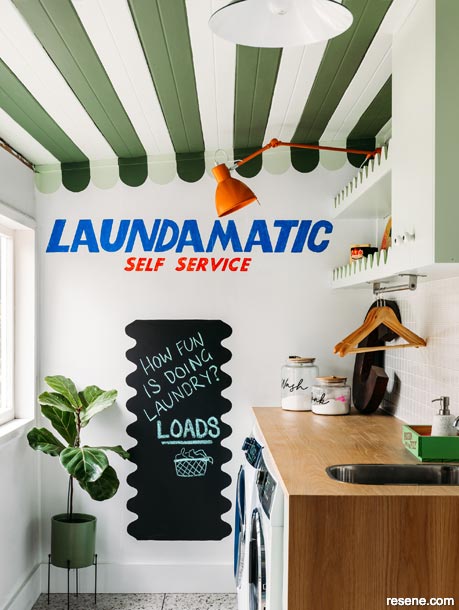
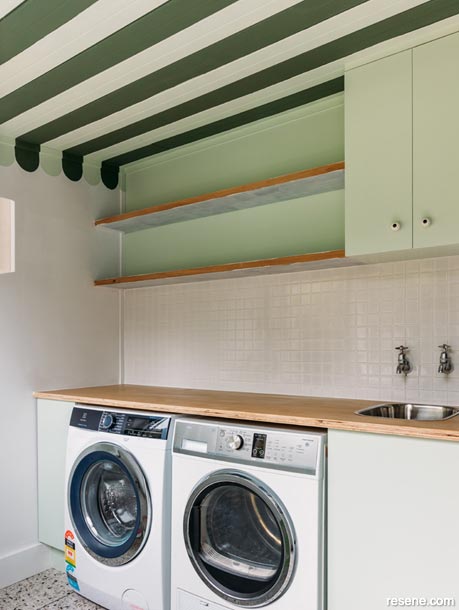
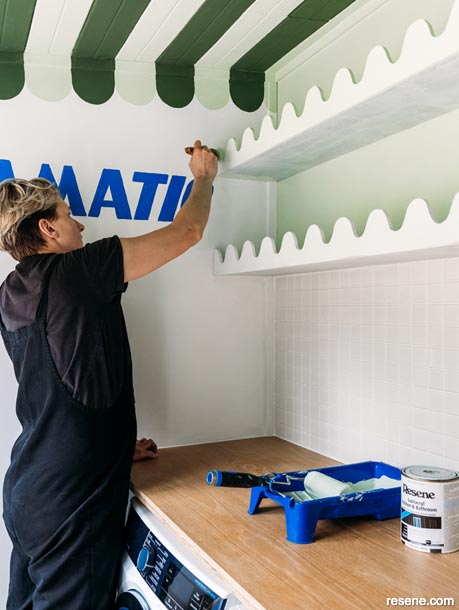
There’s no two ways about it, doing laundry is a chore so why not inject a sense of fun into it with a quick refresh? I painted a striped ceiling, used blackboard paint to make a blackboard, stencilled a word onto the wall, then added some waves to the shelves. Suddenly, the laundry isn’t such a bad place to be.
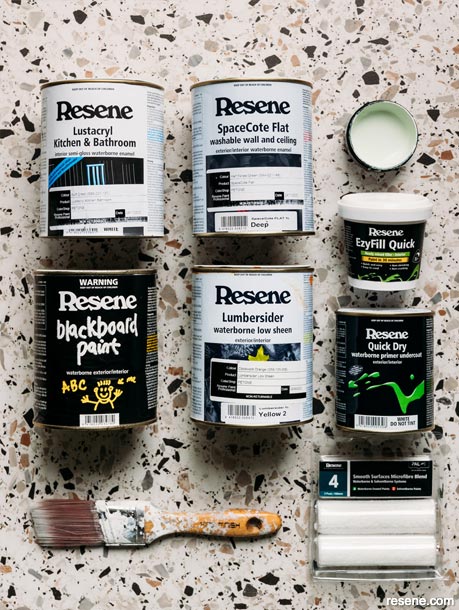
Prepare the ceiling by sanding, then priming with Resene Quick Dry waterborne primer.
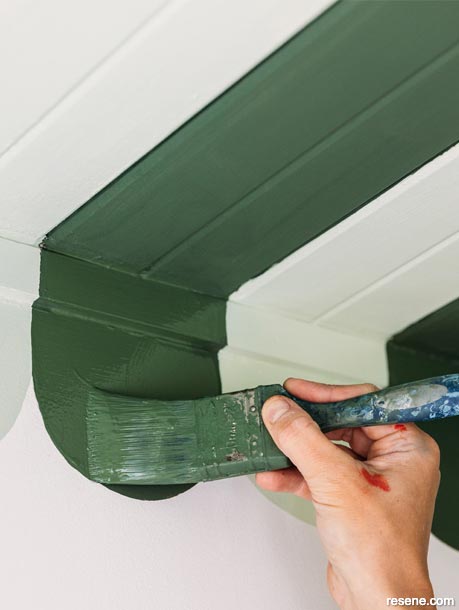
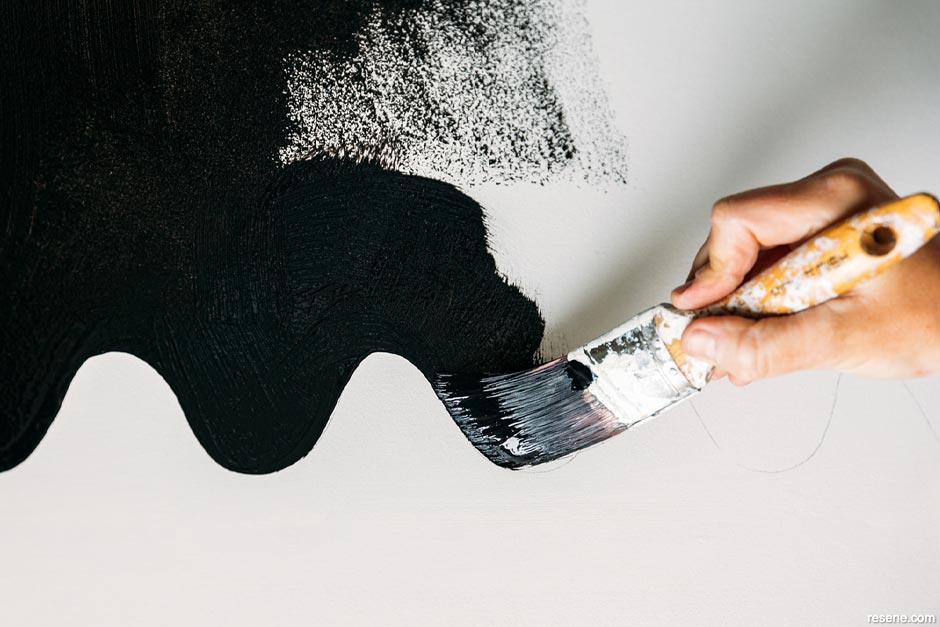
Use painter’s tape to create the stripes. I brought my stripes down the wall and finished them with a scalloped edge. A stencil was used to create the scallops (having a nice wet brush with a fast but steady hand helps to create a smooth circular edge).
Paint half the stripes in two coats of Resene Lustacryl Kitchen & Bathroom semi-gloss waterborne enamel in Resene Surf Crest, allowing the paint to dry between coats. Apply two coats of Resene SpaceCote Flat in Half Forest Green on the other stripes, allowing them to dry in between coats.
Supplies used
Ceiling stripes – Photo (1)
Ceiling stripes – Photo (2)
This wavy shelf edging is a great way to dress up new or existing shelves. It could be added to things such as a bookshelf and the waves could face either up or down. Alternatively, you could cut them as scallops instead of waves.
 Step one
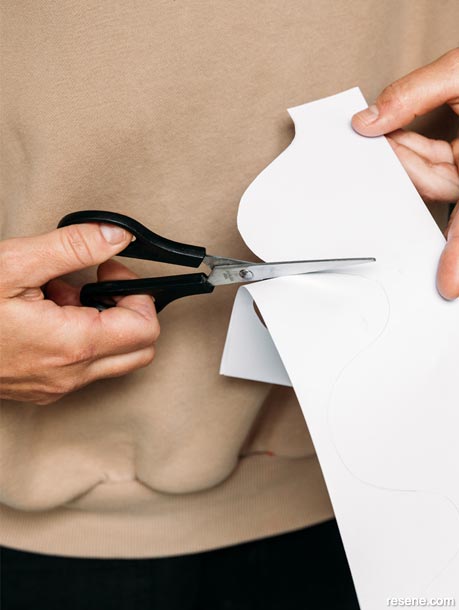
To make a stencil, draw the desired pattern onto paper. I folded the paper over several times to make sure it was symmetrical. Once you are happy with the size of your pattern cut it out.
 Step two
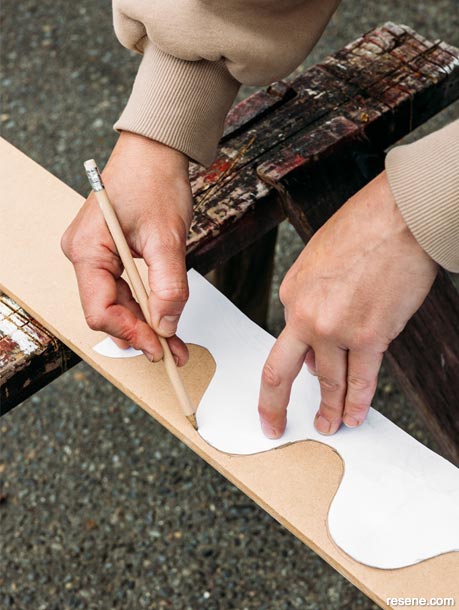
Use the stencil to draw the pattern onto the MDF. I used up leftover lengths I had, but plywood or anything you have at hand could be used. MDF is great because it is lightweight yet stiff.
 Step three
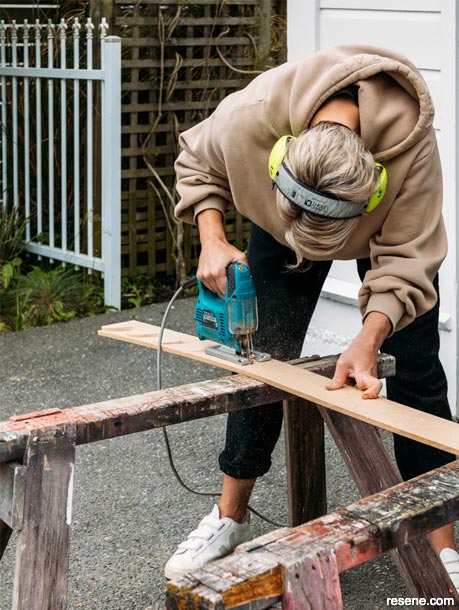
Use a jigsaw to cut around the pattern.
 Step four
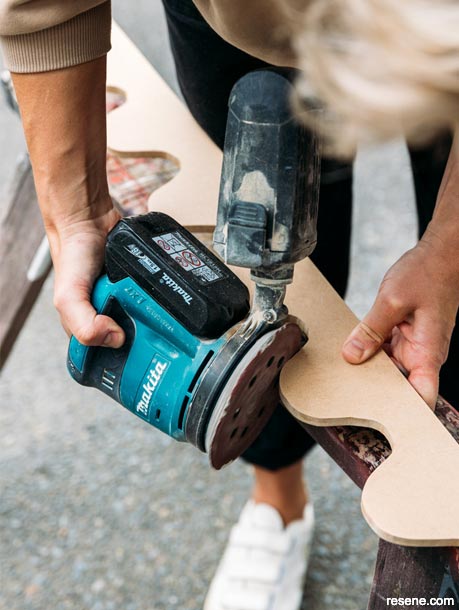
Use a sander to clean up all the edges and any little mistakes you make.
 Step five
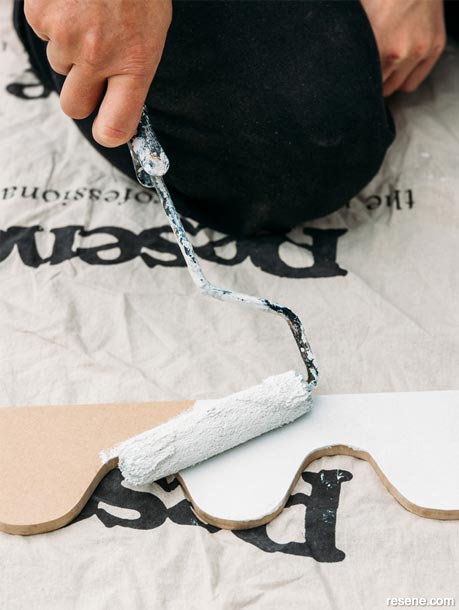
Paint a coat of Resene Quick Dry waterborne primer on all the surfaces before attaching the edging to shelf.
 Step six
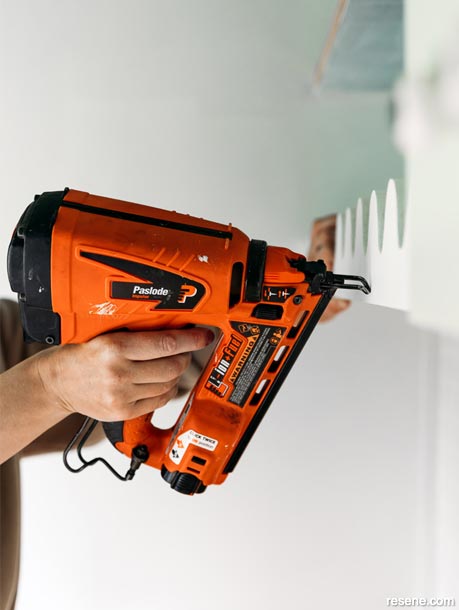
Once dry, fix the pieces to the front face of the shelf using a nail gun or hammer and pin nails. Fill the nail holes using Resene EzyFill Quick. When the filler is dry, give the filled holes a light sand.
 Step seven
Finish with two coats of Resene Lustacryl Kitchen & Bathroom semi-gloss waterborne enamel in Resene Surf Crest.
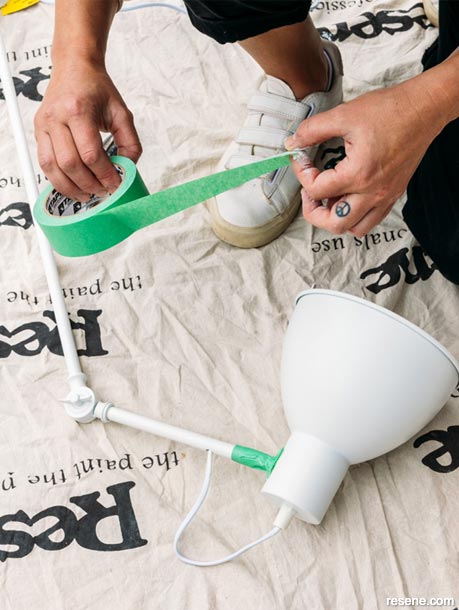
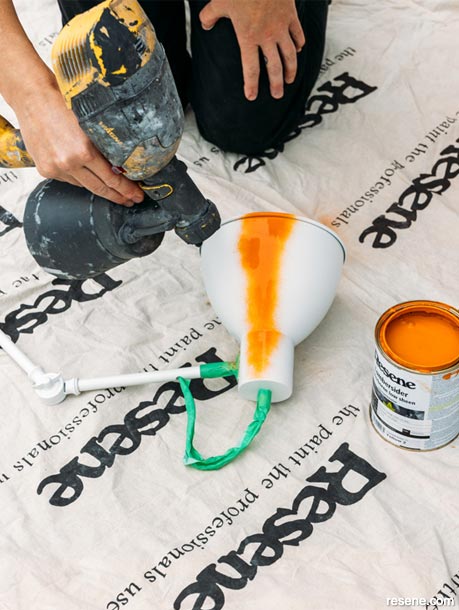
I used Resene Enamacryl in Resene Clockwork Orange to brighten this affordable wall lamp. It can be plugged into an existing wall socket and is a great way to add some extra lighting to a space without having to get an electrician in to add ceiling lights.
 Step one
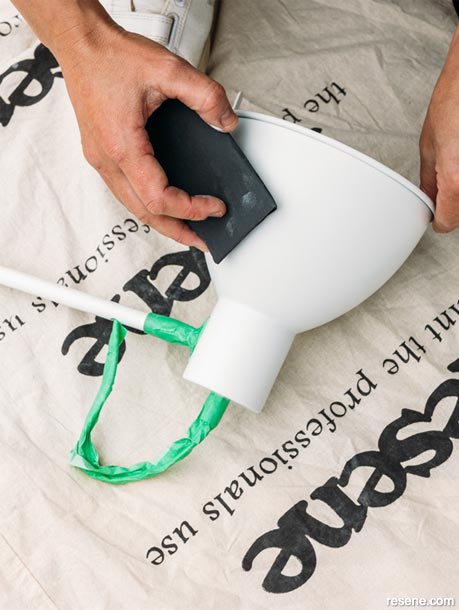
Tape up all the electrical parts and cords thoroughly with painter’s tape. Also tape any other details on the lamp that you don’t want to paint such as metal details.
 Step two
This lamp is metal, so I gave it a light sand and cleaned all the dust off. Because this surface was already painted there was no need for priming, but if you are unsure ask your local Resene ColorShop team who can advise the best primer for you.
 Step three
To create a streak-free finish, I used a paint spray gun for the topcoat. I applied three coats of Resene Enamacryl gloss waterborne enamel in Resene Clockwork Orange.
Draw the desired shape, use painter’s tape if desired. I used the stencil for the shelves to create the waves.
Paint at least two coats of Resene FX Blackboard Paint or, if you prefer, a coloured chalkboard use Resene FX Chalkboard Paint in your chosen colour.
 Step one
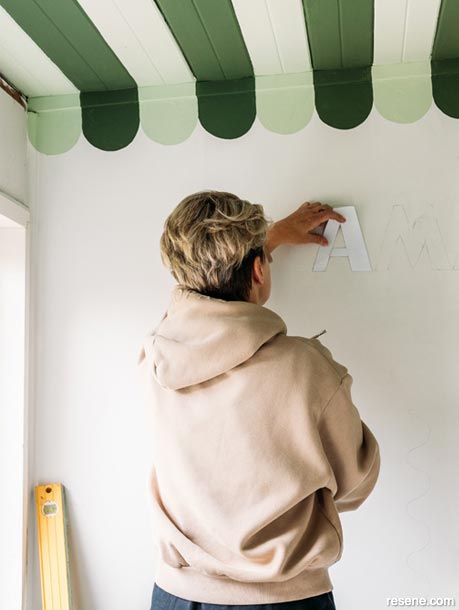
Find the font and size you want, print letters out then cut them to create a stencil.
 Step two
Draw the letters onto the wall in pencil. Ensure they are level by drawing a level line.
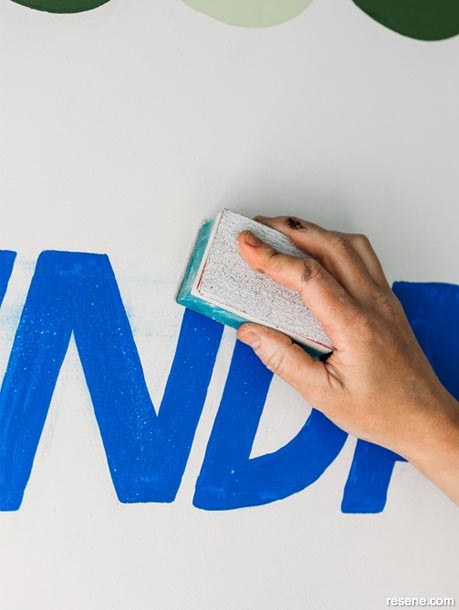 Step three
Paint in the letters. I used Resene SpaceCote Flat in Resene Half Resolution Blue. Once dry lightly sand with a 240-grit sandpaper for a more vintage look.
Project: Nikki Kettle. Photography: Anna Briggs. Feb 2024.
▸ Download a PDF of this article
Projects from Your Home and Garden
Our resident DIY expert, Nikki Kettle, shares the latest tips and DIY projects.
![]() Get inspired ! Subscribe
Get inspired ! Subscribe ![]() Get saving ! Apply for a DIY card
Get saving ! Apply for a DIY card
![]()
Can't find what you're looking for? Ask us!
Company profile | Terms | Privacy policy | Quality and environmental policy | Health and safety policy
Colours shown on this website are a representation only. Please refer to the actual paint or product sample. Resene colour charts, testpots and samples are available for ordering online. See measurements/conversions for more details on how electronic colour values are achieved.
What's new | Specifiers | Painters | DIYers | Artists | Kids | Sitemap | Home | TOP ⇧